![]()

|
Home About
Us
|
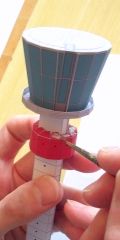
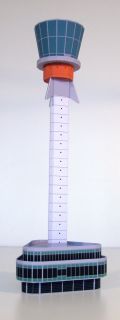
How to build card models Each Airport Designs model consists of a number of A4 sheets of card. Printed on the card are the parts of the model. All the parts need to be cut out of the card, some need to be folded, and they all must be glued together to form the finished model. Where parts must be folded, scoring lines are indicated on the card. So that the parts will fold more easily and cleanly, these lines should be scored with a sharp tool before the model is cut out. Some parts need to be folded downwards (a hill fold) and some need to be folded upwards (a valley fold). Downward folds are most common. There are a number of different ways of scoring the card, and it is best to experiment with different methods to see which works best for you and your tools. The parts must be cut out with a sharp knife and straight cutting edge. There are very few curved edges in these models, but where there are curves they will need to be cut carefully by hand. When the model parts have been cut out, they need to be glued together. Many parts have small tabs along their edges that need to be folded and then glued to adjacent parts. Some parts are glued back-to-back, especially in models like hangars that have internal details. Every model comes with detailed instructions that give step-by-step guidance on how to build the model. The instructions include diagrams to illustrate each stage of construction and to show how the parts fit together. It is vitally important to follow the instructions, to have the right tools, and to be patient. Where complex or small parts are included, two copies are often printed on the card to cater for mistakes in cutting out or building. There is also a sheet of General Building Instructions for models (this can be viewed on-line by clicking here). A copy of this sheet is provided with all model orders. For the downloadable pavement sheets there is a separate set of Pavement General Instructions (this can be viewed on-line by clicking here). Finished models can be included in diorama displays or shown individually. All models have tabs or other fittings to allow them to be fixed to a base board, or they can simply be put into place without gluing so they can be removed for safe storage. Please note that the models are not suitable for children and are intended for adult modellers only. Look at the other pages on our website to find out more about our models and how to build them. You can download and print models, or you can see a detailed tutorial by going to the Tutorial page. |
|

This document is maintained
by DM Aviation Limited
All Material Copyright © DM Aviation Limited 2011