HomeHome

About Us   |   Terms & Conditions   |   Contact Us

Home
1:400 Scale
1:500 Scale
Information
      How To Build
      Scales
      Skill Ratings
      FAQs
      Hints & Tips
      Downloads
      Pavements
      Tutorial 1
      Tutorial 2
      Links
Gallery

About Us
Terms & Conditions
Contact Us

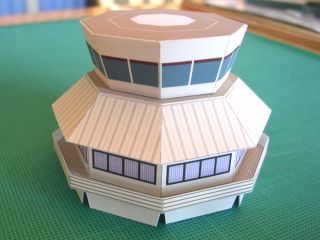
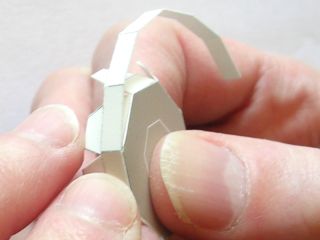
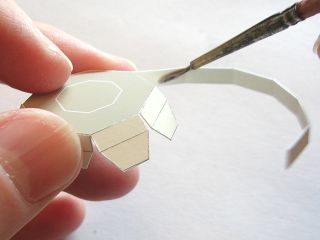
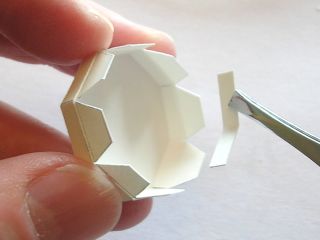
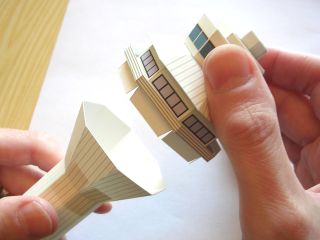
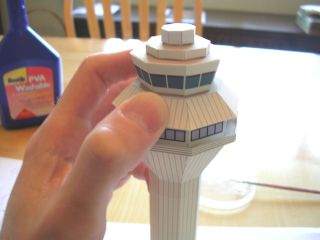
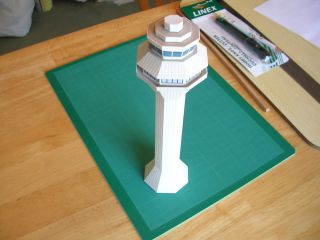
Tutorial 1 - Control Tower Type 4 (B1017) - Page 5


The ACR and VCR assemblies need to be joined so that they are absolutely level. This is how they look when joined together.
 

The equipment housing is built in a similar way to the VCR, with the walls wrapped around the frame one-by-one.
     

When fitting something like these walls, it's best to apply the glue to the wall itself as it makes it less likely that glue will get on the exposed parts of the frame.
 

As with the VCR, we need to fit the wall joiner to close the gap between the ends of the walls.
     

The radome is built in the same way again. It's a good idea to press the frame into place behind the walls with the end of the paintbrush until the glue is dry. This is quite a fiddly operation, as the radome is a very small assembly. It can be left off the model if necessary.
 

Then the radome is glued to the top of the equipment housing.


The equipment housing is glued to the top of the VCR. It needs to be held in place until the glue is dry, as there's no way to press them together from underneath.


To fit the ACR/VCR assembly to the central column, we put glue on the tabs around the bottom.
     

As we're building the model with the alternative ACR floor, we also put a tiny amount of glue around the very top of the column upper cone. This will help to hold it in place against the ACR floor. (We wouldn't have done this if we'd used the normal floor.)
 

Then we carefully fit the two assemblies together, making sure that all the tabs go inside the cone.
     

As there's no way of pressing the tabs into place inside the model, we just have to hold it together until the glue is dry.
 

And the model is finished.
     
< Page 4    

This document is maintained by DM Aviation Limited
All Material Copyright © DM Aviation Limited 2011